.png)

SuiteScript
Realtime Asynchronous Processing in NetSuite
There are no solutions, only trade-offs.
By
Simon Camilleri
May 20, 2026
Combine OAuth 2.0 Authorization Code Grant with Client Credentials and the Certificate Rotation Endpoint to automate secure customer onboarding for your NetSuite app.

In parts one, two and three of our OAuth 2.0 deep dive, we discussed the background to OAuth 2.0, the different roles involved, the official protocol flow, and then took a small but relevant detour into PKCE.
If you have read the previous posts, great. If not, and you are mainly here for the practical goodies, stick around.
The final article closes out the series by:
Excited?! So am I. Let’s go.
Here’s the one minute summary from our last 3 posts to set the stage.
OAuth2.0 is the industry standard for integrating applications. NetSuite now recommends it as the preferred authorization method. Use cases are many, but mostly it’s to give third-party Client Applications access to your NetSuite accounts.
Each client must be given permission to access your NetSuite account, and OAuth2.0 is the framework for mediating this access. A good example is Claude accessing your NetSuite account using the NetSuite AI Connector Service.
In the NetSuite world, the two OAuth 2.0 grant types you will care about most are:
Each is designed for a different kind of setup.
PS: by the end of this post, you should be able to guess which of the OAuth2.0 Grant Types Claude’s own client uses to access your account.
Now normally, I would start with the theory and then move to practical examples. For this final post, however, we will focus on practical application.
If you’ve ever developed an application for NetSuite, you know that onboarding new customers has typically been a somewhat manual and painful process.
You write an article, maybe record a video, or write some documentation which you need to keep up-to-date as things and the world moves forward in time. In any case, onboarding customers invariably involves some combination of the following steps:
Some degree of manual interaction is always going to be needed, and in places it should be. But onboarding is your customer’s first real experience with your application, so the goal should be to make this process as frictionless and hands-off as possible.
A good user experience is one thing. We also want this process to be secure however. More than ever, going the extra mile for added security is no longer an option.
Therefore without further ado, let’s combine the use of both OAuth2.0 grant types, some neat settings on the Integration Record, some less well-known SuiteScript apis and last but not least an incredibly exciting new feature from the NetSuite 2026.1 release, to design a secure customer onboarding flow.
Every application built for NetSuite needs access to the customer’s account.
For an application’s primary long-term connection, the Client Credentials OAuth 2.0 grant type is usually the best fit. This is the machine-to-machine model: your application proves its identity and communicates with the customer’s NetSuite APIs without requiring ongoing user interaction. The connection can remain active for a maximum duration of 2 years.
As an application owner, you will generate a certificate for your app. The customer will upload the public key into their account, granting your application access under the scopes enabled on your application’s Integration Record.
Now for the bombshell.
Until 2026.1, this part of the process was still largely manual. In practice, that usually meant asking the customer to upload your application’s public certificate themselves under:
Setup > Integration > Manage Authentication > OAuth 2.0 Client Credentials (M2M) Setup (Administrator).
This was fine, we were using the best practice for authentication, but from a user experience perspective, not so great.
Enter the Certificate Rotation Endpoint.
This new feature allows authenticated users with the Manage own OAuth 2.0 Client Credentials certificates permission to automatically configure and upload the public key.
This is exactly what we need to automate one of the most manual parts of the onboarding flow.
In OAuth 2.0 parlance, this means we can now establish the authorization grant needed for our Client Credentials connection by programmatically uploading the public certificate, rather than asking the user to do it by hand.
That removes a major onboarding touchpoint.
But wait, you might be thinking, if the customer is completely new, and our application doesn’t yet have access to their account, how are we going to upload this certificate? In fact the certificate rotation endpoint needs an Authorization header with a Bearer token, aka an Access Token tied to a role with the Manage own OAuth 2.0 Client Credentials certificates permission mentioned above.
We need to establish our app connection by uploading the public key, but to upload the public key we need an app connection. In other words we need a key to upload our key?!
This is where things get exciting. And where we actually draw upon the second OAuth2.0 mode - the Authorization Code Grant Flow.
Unlike the Client Credentials flow connection, which we will use for our main long-term access, and which is typically meant for machine communication, the Authorization Code Grant Flow is usually reserved for delegated user access, meaning a NetSuite user can grant an application access to their account using a role of their own choosing, and for a limited time period. And this is key.
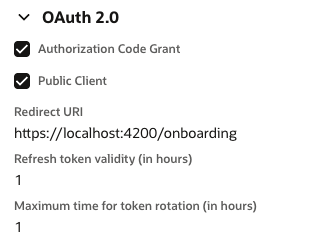
What this means is that the customer can essentially give your application, Administrator access to their account, for a short period of time, long enough say to run all the installation operations needed for your application setup. The settings you see above enable this. Your application’s Integration Record will indicate that Authorization Code Grant should be supported, with the shortest possible lifespan for re-authorization, which is one hour (you must use public client and PKCE for this to be possible).
So here you are essentially telling the customer, “with your permission, give me Administrator access for one hour only, so that I can finish completing setup on your behalf, and when that time is up, I will only be able to use this connection if you re-authorize”.
This gives us a one hour window to:
And best of all, this is short-lived one hour Administrator access, which from a security standpoint is a lot better than requesting long-term Administrator access.
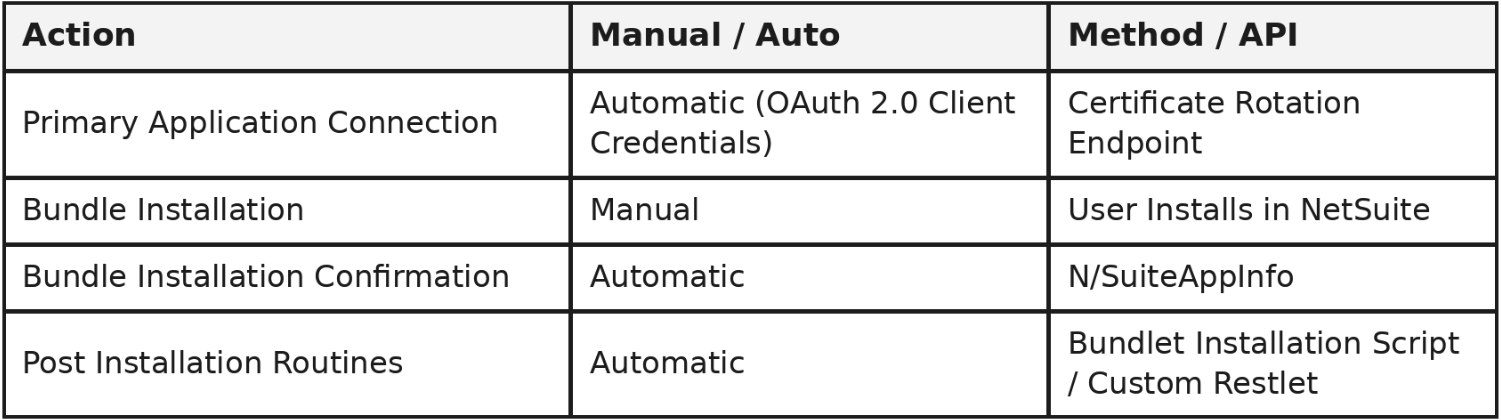
Here’s a summary of the high-level objectives from the onboarding flow, indicating whether each could be automated or needs to be performed manually by the user:
Using this powerful combination of NetSuite tools, we can proceed with building an onboarding flow that will automate a lot of the usual tedious setup tasks. In our case, our application will be packaged as a Bundle.
The first thing we need is elevated access to ensure we can run all setup operations. To do this, the User installing our application will give us their consent to temporarily access their account in their name, using Administrator or any role with sufficient permissions. The 1 hour session and refresh token validity setting from our app’s Integration Record makes the transaction a lot more secure.
The Authorization Code Grant Flow is perfect for this kind of access, and so your application will initiate the flow in Step One.
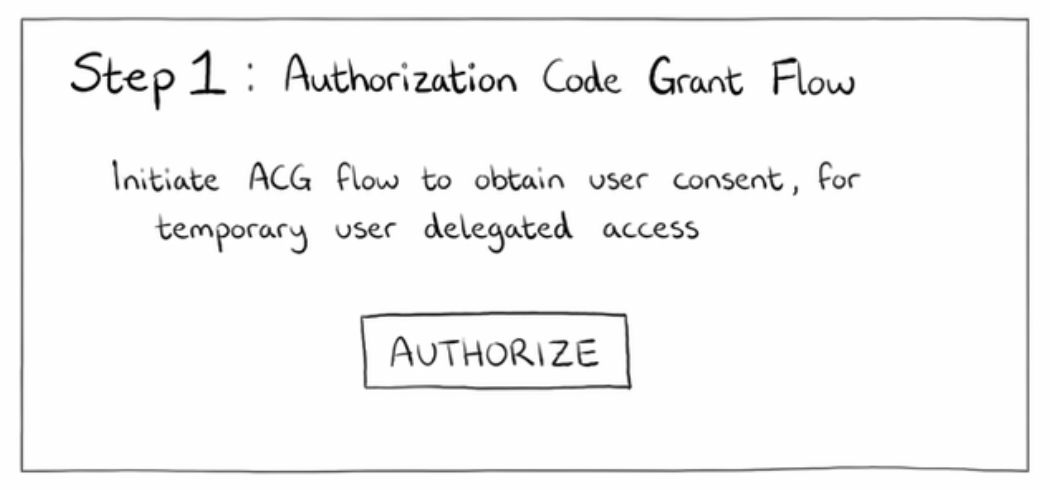
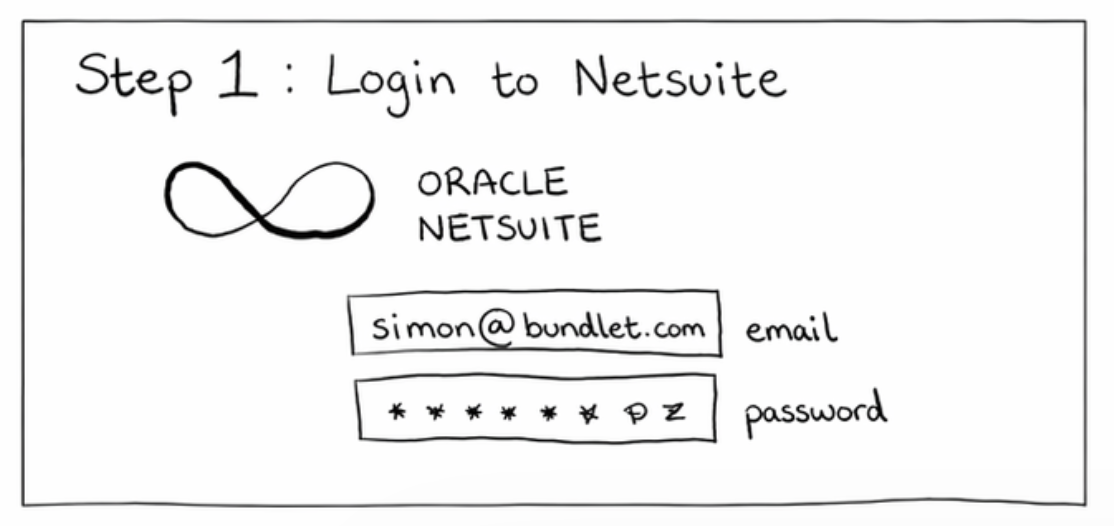
The user is redirected to login to NetSuite with the appropriate Role, and give their consent.
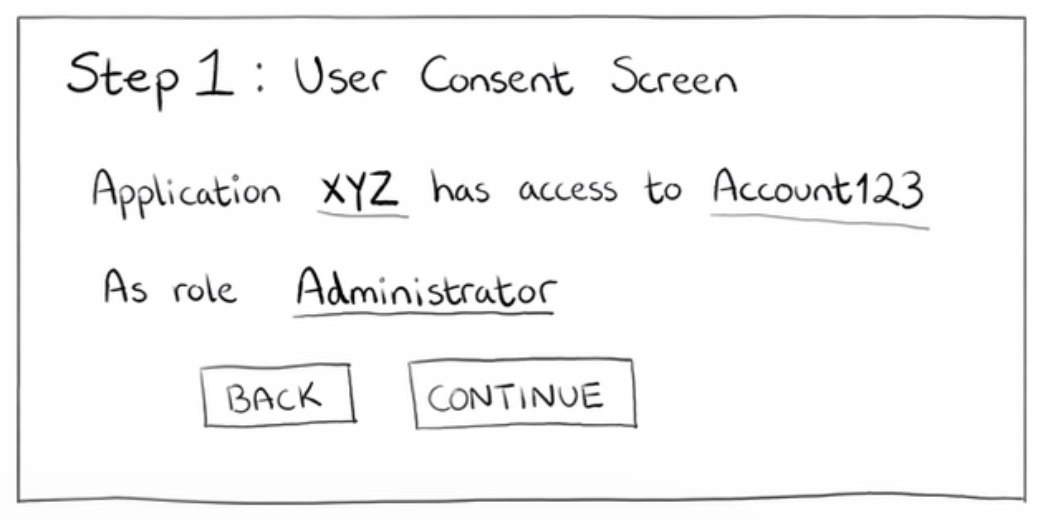
After an authorization decision is made, the user is redirected back to our app, which can now run operations via the NetSuite apis using an Access Token it receives through the Authorization Code Grant Flow.
Given that this Application is packaged in the form of a Bundle, the next step is for the user to install our Bundle in their account. This will come with a least-privilege role with all the permissions our app needs to do its daily tasks. This is the only manual step in this flow.
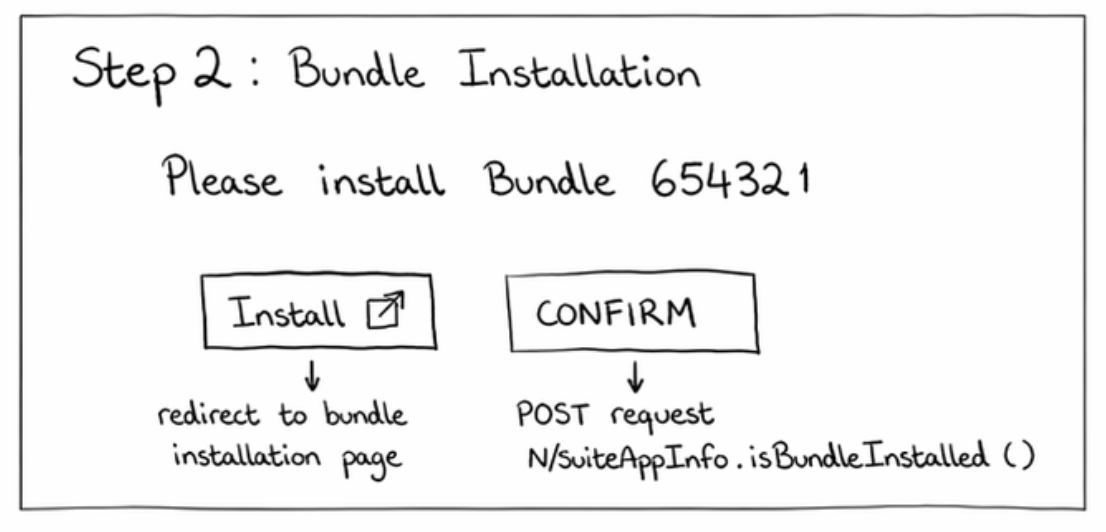
The Install button will load up our Bundle in the marketplace avoiding the need for the user to search for it themselves. All they need to do is accept and install. Once the Bundle is installed, they come back into the app to confirm installation.
For that we use the N/SuiteAppInfo.isBundleInstalled api to verify installation. Again using the Access Token from the ACG flow.
Step 3 is where we set up long-term access for our application, using the Client Credentials OAuth2.0 grant type. To do that, our app can either generate a new RSA key for this tenant, or simply use a pre-created one. In any case, we can now automate this step by using the new certificate rotation endpoint, uploading the public key into the customer’s account, against the role from our Bundle.
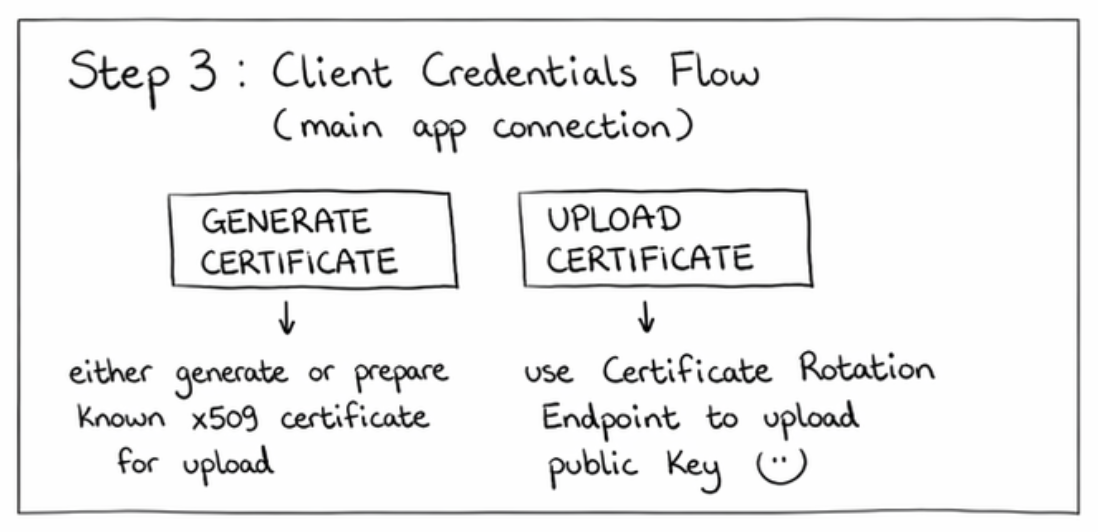
You can already go ahead and test the connection in the background once the user Uploads the certificate. You could for example, try to hit one of your Restlet’s, or simply run a SuiteQL query if you have REST Web Services enabled on your integration record.
Important: this time we authenticate using an Access Token minted through the Client Credentials flow, and using the private key counterpart to the public key we just uploaded - not the temp access token we got in Step 1.
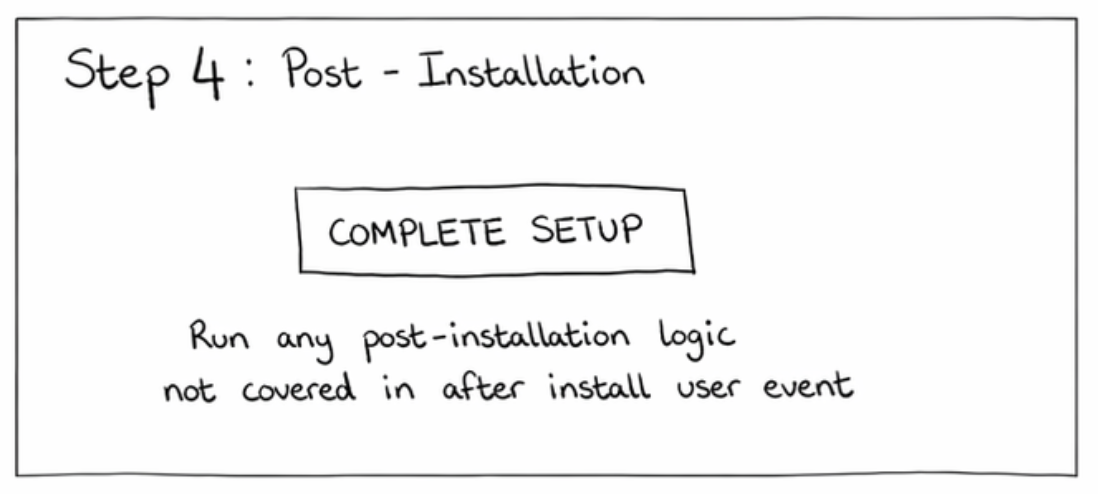
This step is optional, but extremely useful.
Now that the application has both:
you can automate any remaining setup tasks that are not already handled by Bundle installation scripts.
That might include:
If you have temporary elevated access, you may as well make good use of it!