Bundlet NetSuite Client Credentials (Machine to Machine) Grant
This form of authentication needs to be set up once unlike the Authorization Code Grant which must be renewed by the user every 7 days following intial setup.
To get set up with Client Credentials, follow these steps:
Integration Record
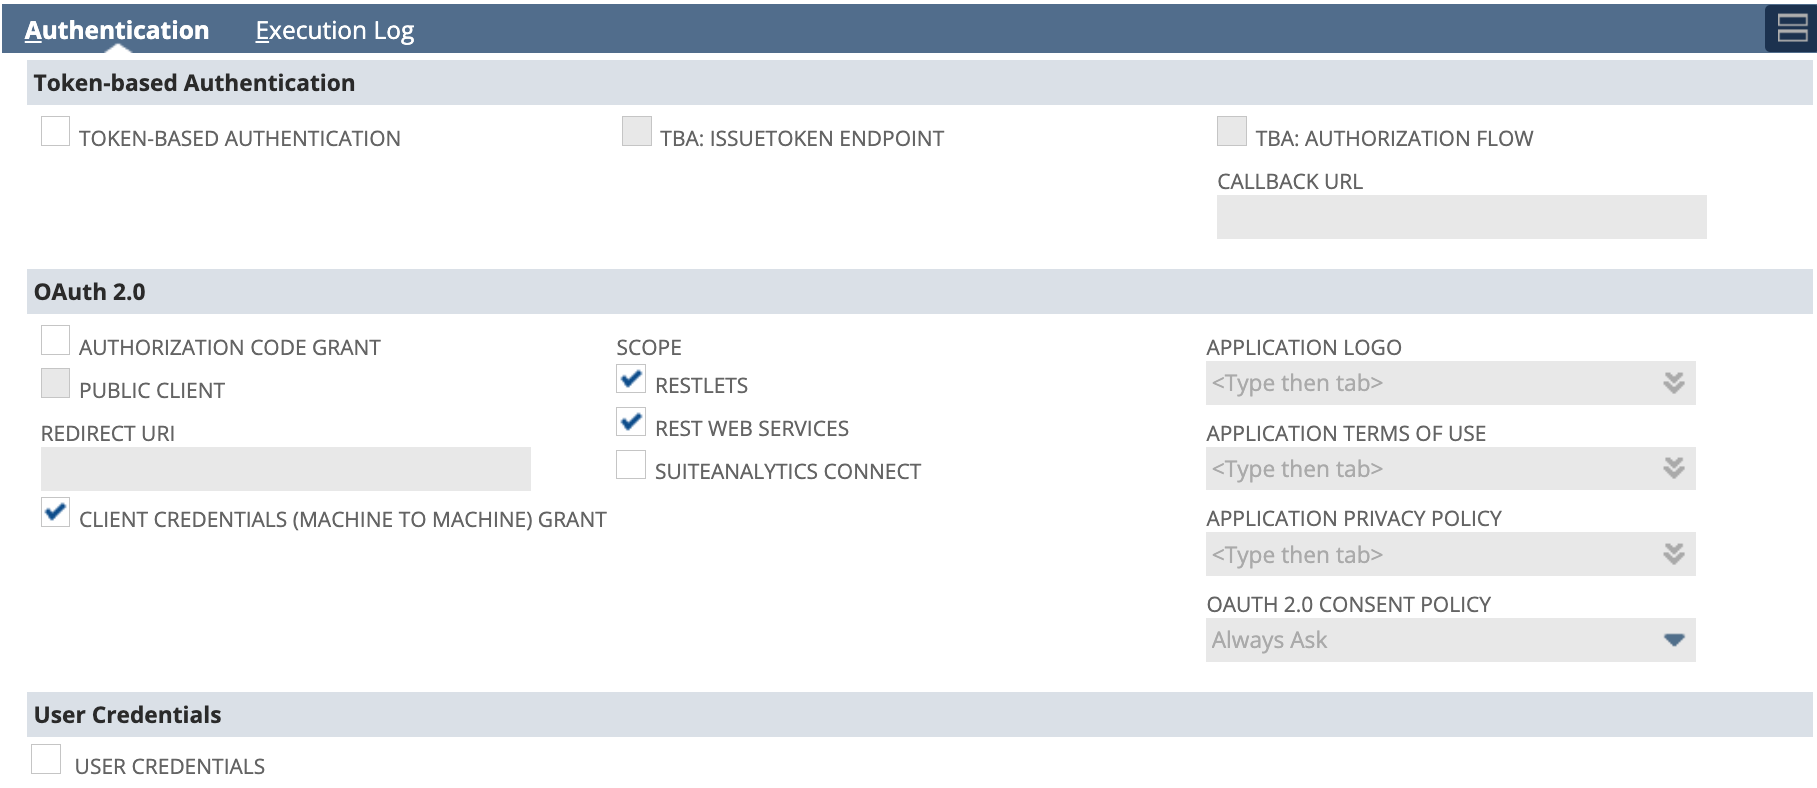
Go to Setup > Integration > Manage Integrations > New to create a new Integration record for Bundlet:

The most important settings here are the:
- Client Credentials (Machine to Machine) Grant checkbox
- Scope - Restlets/Rest Web Services
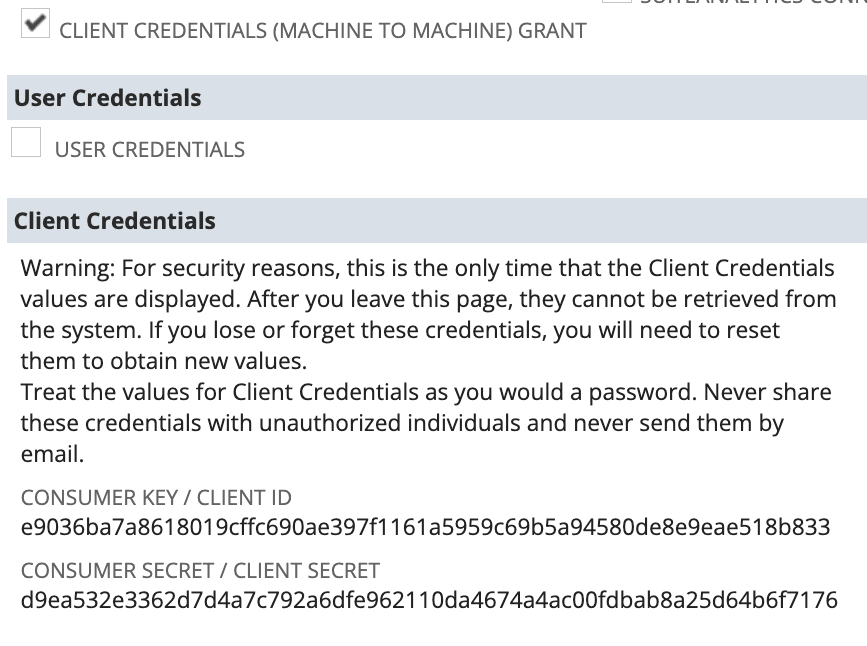
Take note of the Consumer Key / Client Id NetSuite assigns to this integration, it must be entered back in Bundlet.

NB :- you could of course update any existing integration as long as you know the Client Id, and enable the Client Credentials checkbox and appropriate scope.
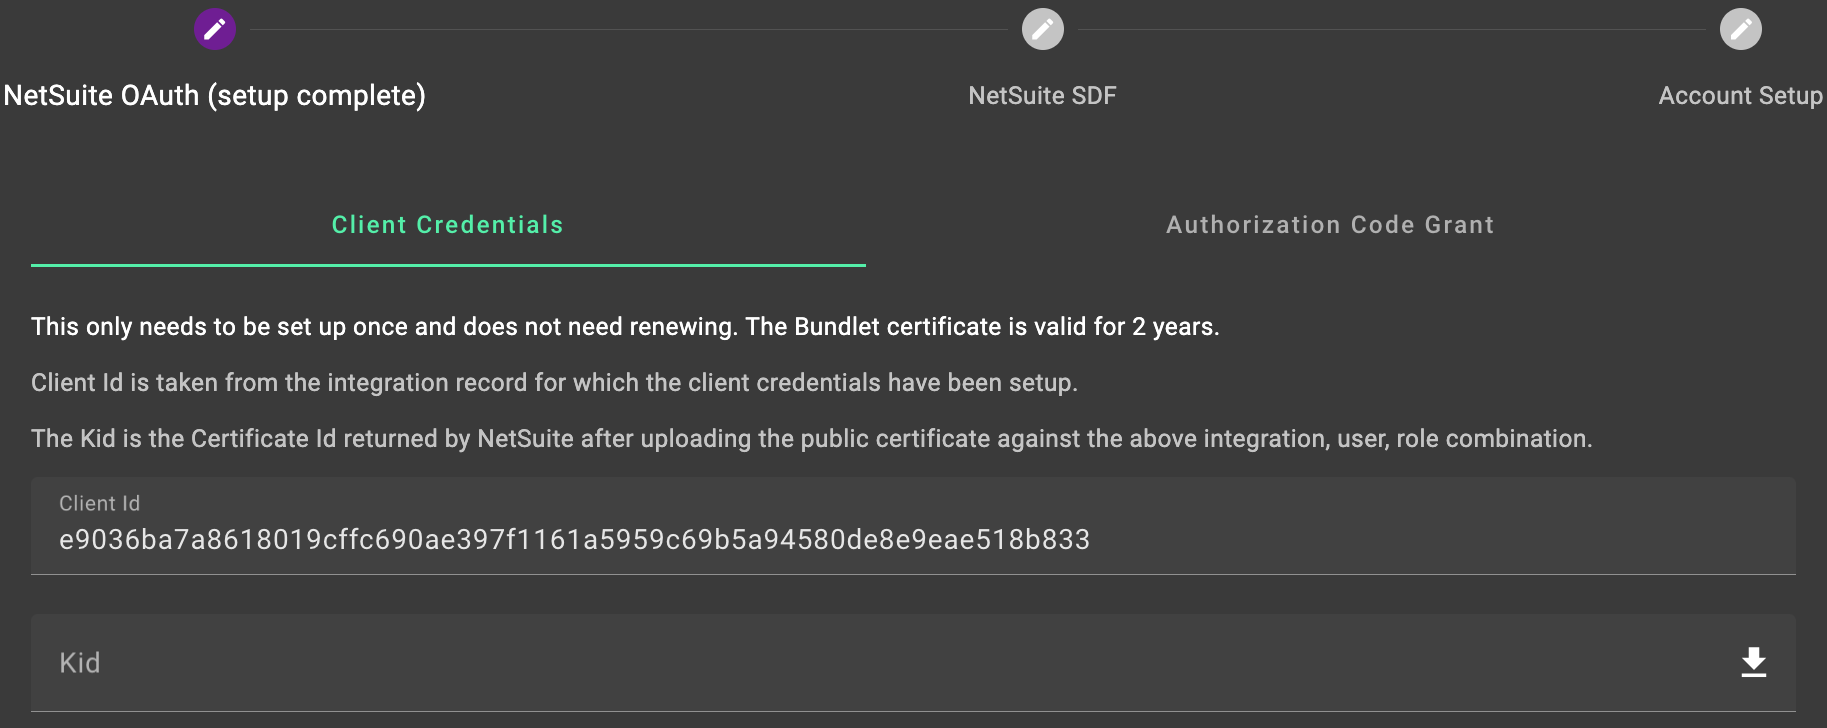
The Consumer Key value needs to be entered in the Client Id field in the Bundlet setup.

Certificate Setup
From the Account Setup wizard in Bundlet, download the public certificate from the Client Credentials subtab. The download button is located to the right of the input field labeled Kid
Back in NetSuite, navigate to Setup > Integration > OAuth 2.0 Client Credentials (M2M) Setup
Hit CREATE NEW
For Entity and Role, specify the appropriate user and role that Bundlet should assume when hitting the respective Restlet.
For Application, enter the Integration created in the first step.
Upload the certificate we just downloaded from Bundlet for the Certificate field.
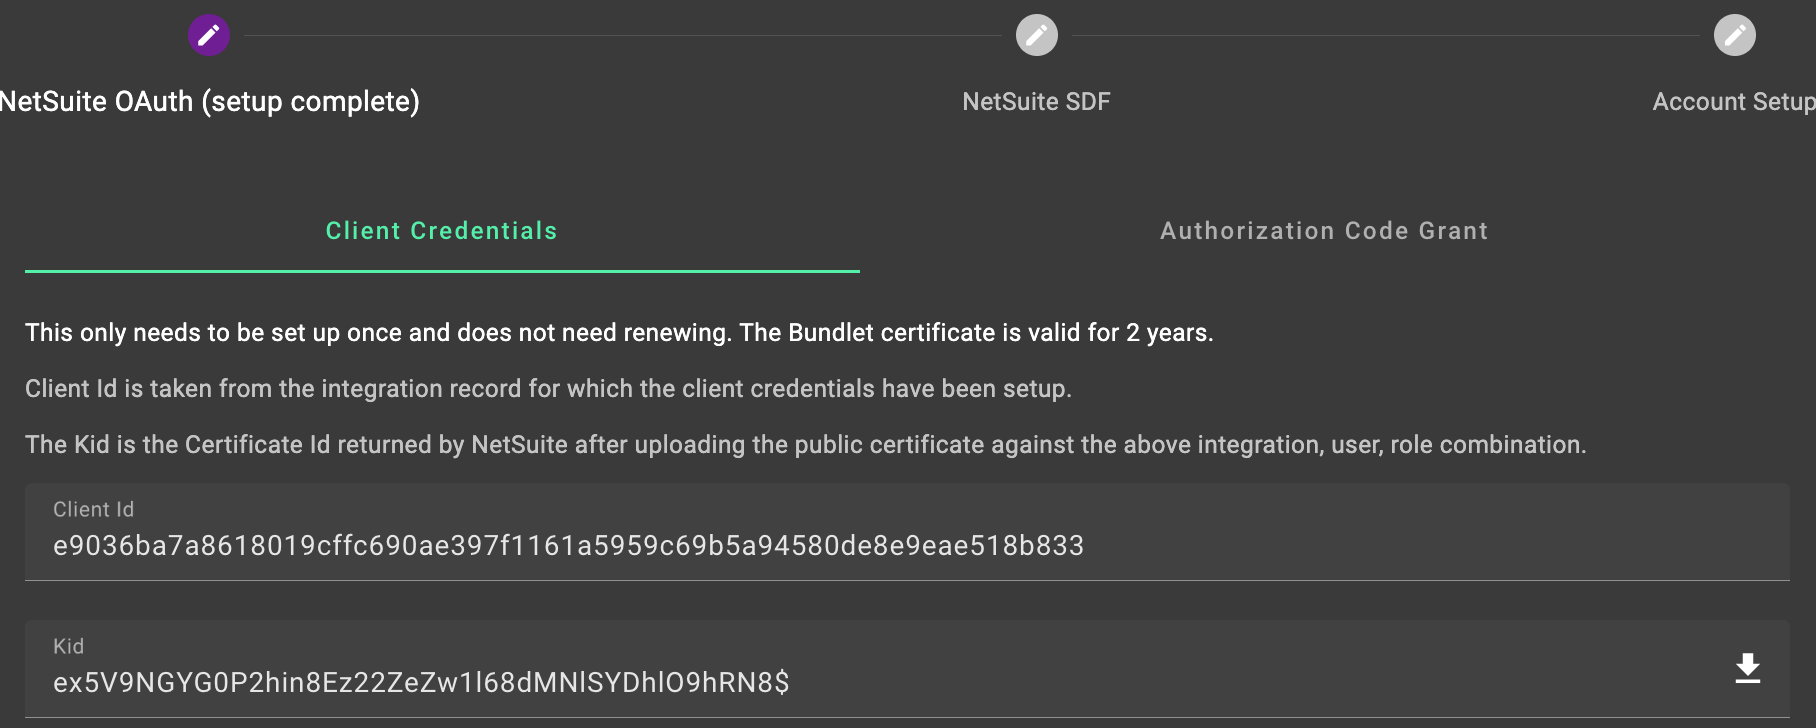
Once the entry is created, take note of the Certificate ID value as this needs to be entered inside Bundlet.

Enter the Certificate Id from NetSuite into the Kid field inside Bundlet.

And that's it.
At this stage simply hit AUTHORIZE and await confirmation. If successful then OAuth setup is complete.
.png)
